Previously, we published a feature that enables gyms to publish their workouts anywhere. Through an RSS or HTML feed, gyms can publish their workouts automatically, through SugarWOD, to any channel that supports RSS or HTML. For the most part, that means your website, but it also means your Facebook page.
We know that many CrossFit gyms use Facebook as a place to publish and promote the day’s WOD. In an effort to arm you with everything you need to post your workout to Facebook, we have put together instructions.
Before you begin, you need four things:
- A Facebook page – You probably already have that.
- A SugarWOD account – Sign up here.
- An activated RSS feed – See instructions here.
- A Zapier account.
If you got stuck on that last one, don’t worry, we’ve got you.
Zapier is a web automation tool. It essentially connects software systems that aren’t already connected and is made up of triggers that prompt actions. Triggers and actions can be mixed and matched to automate just about anything. For example, when you publish the WOD in SugarWOD, Zapier can be programmed to post that WOD to your gym’s Facebook page.
Here are the steps:
Step 1: Make sure that you are the admin of your Facebook page.
Step 2: Activate your SugarWOD RSS feed. First, log in, then:
- Turn on workout publishing on the RSS / HTML Settings page.
- Choose the number of days (into the past) you’d like to publish. Enter “0” if you only want to publish the current day’s workouts. Enter “7” to publish the past 7 days of workouts.
- Choose the number of days (into the future) you’d like to publish. Enter “0” if you do not want any future workouts to be included. No matter your setting here, workouts will abide by the Whiteboard publishing settings.
- Choose the workout tracks that should be included in the feed.
- Choose the “RSS” format.
- Copy the URL.
The URL will look something like this and can be used in any standard RSS feed reader.
https://www.sugarwod.com/public/api/v1/affiliates/YOUR-GYM-ID/workouts/days/7/rss?tracks=[“workout-of-the-day”]
*Note: In the URL above, “YOUR-GYM-ID” is a placeholder for your gym’s unique ID. Be sure that your ID is included in the URL or this whole thing won’t work 🙂
Step 3: Sign up for Zapier (its free). Then, click the Make a Zap! button, or visit this page to begin setting up your “Zap” to publish your workouts to your Facebook page.
Here are the steps you should experience in Zapier as you set up your Zap. (make sure you have your RSS url)
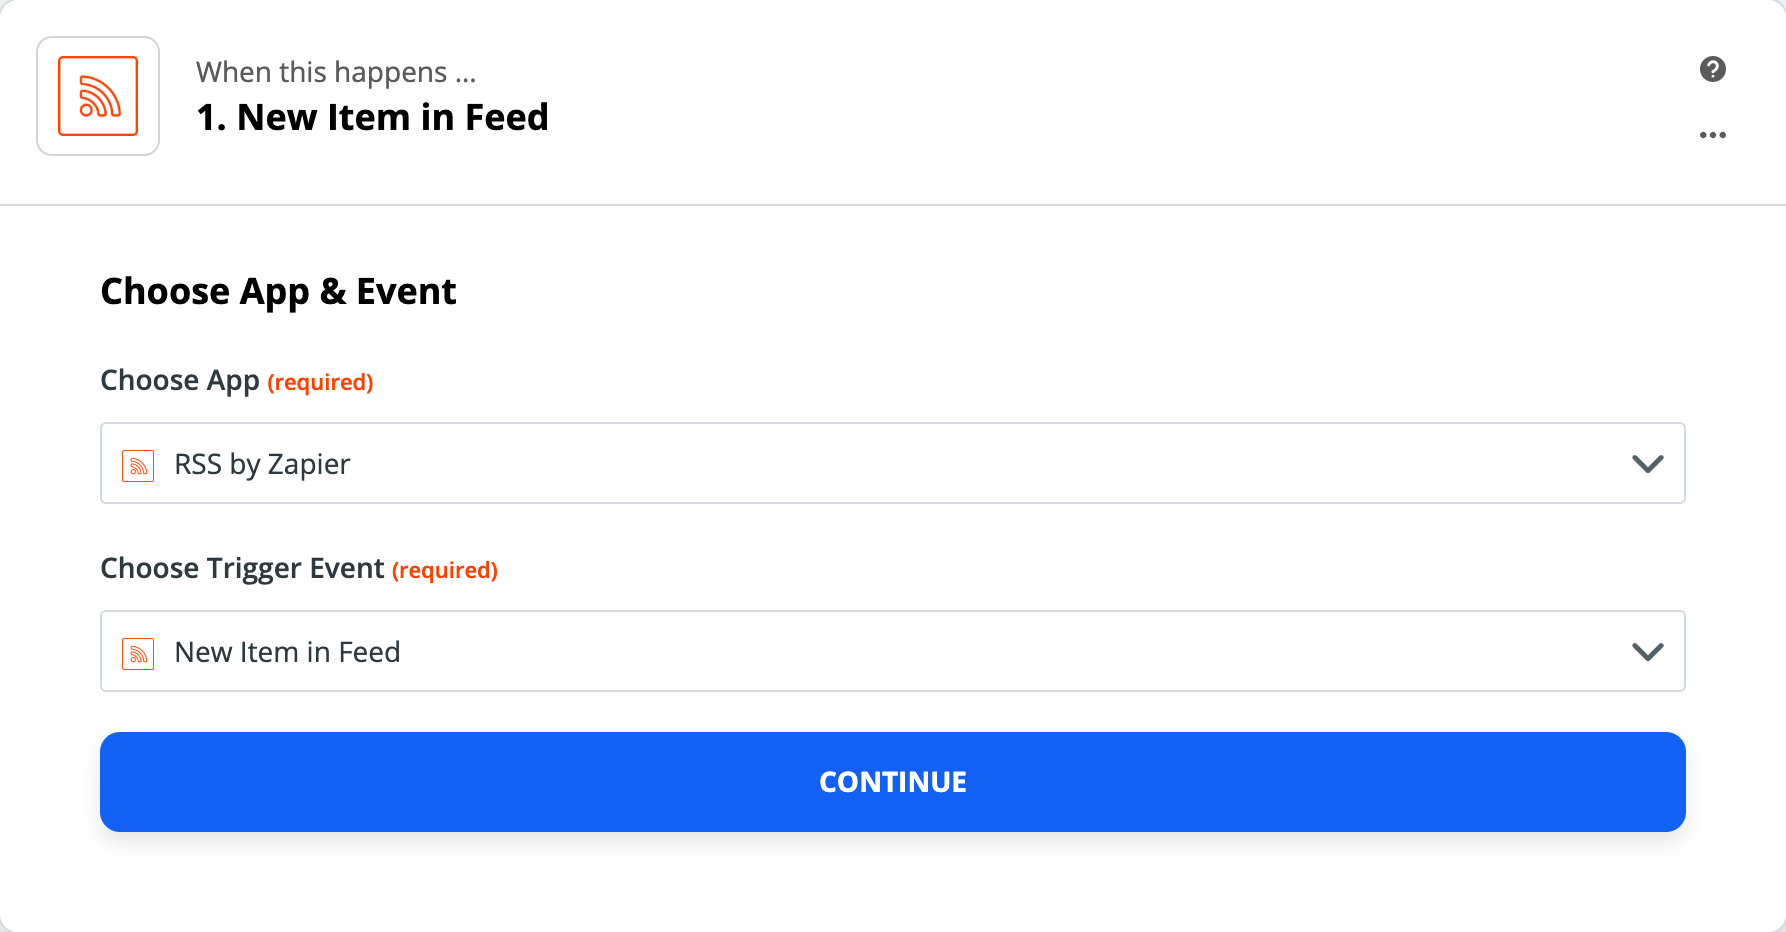
- Find the RSS by Zapier app. You should find this in the Built-In Apps section, but you can also search for it.
- The event is triggered off of a “New Feed Item” happening e.g. A new workout has been published
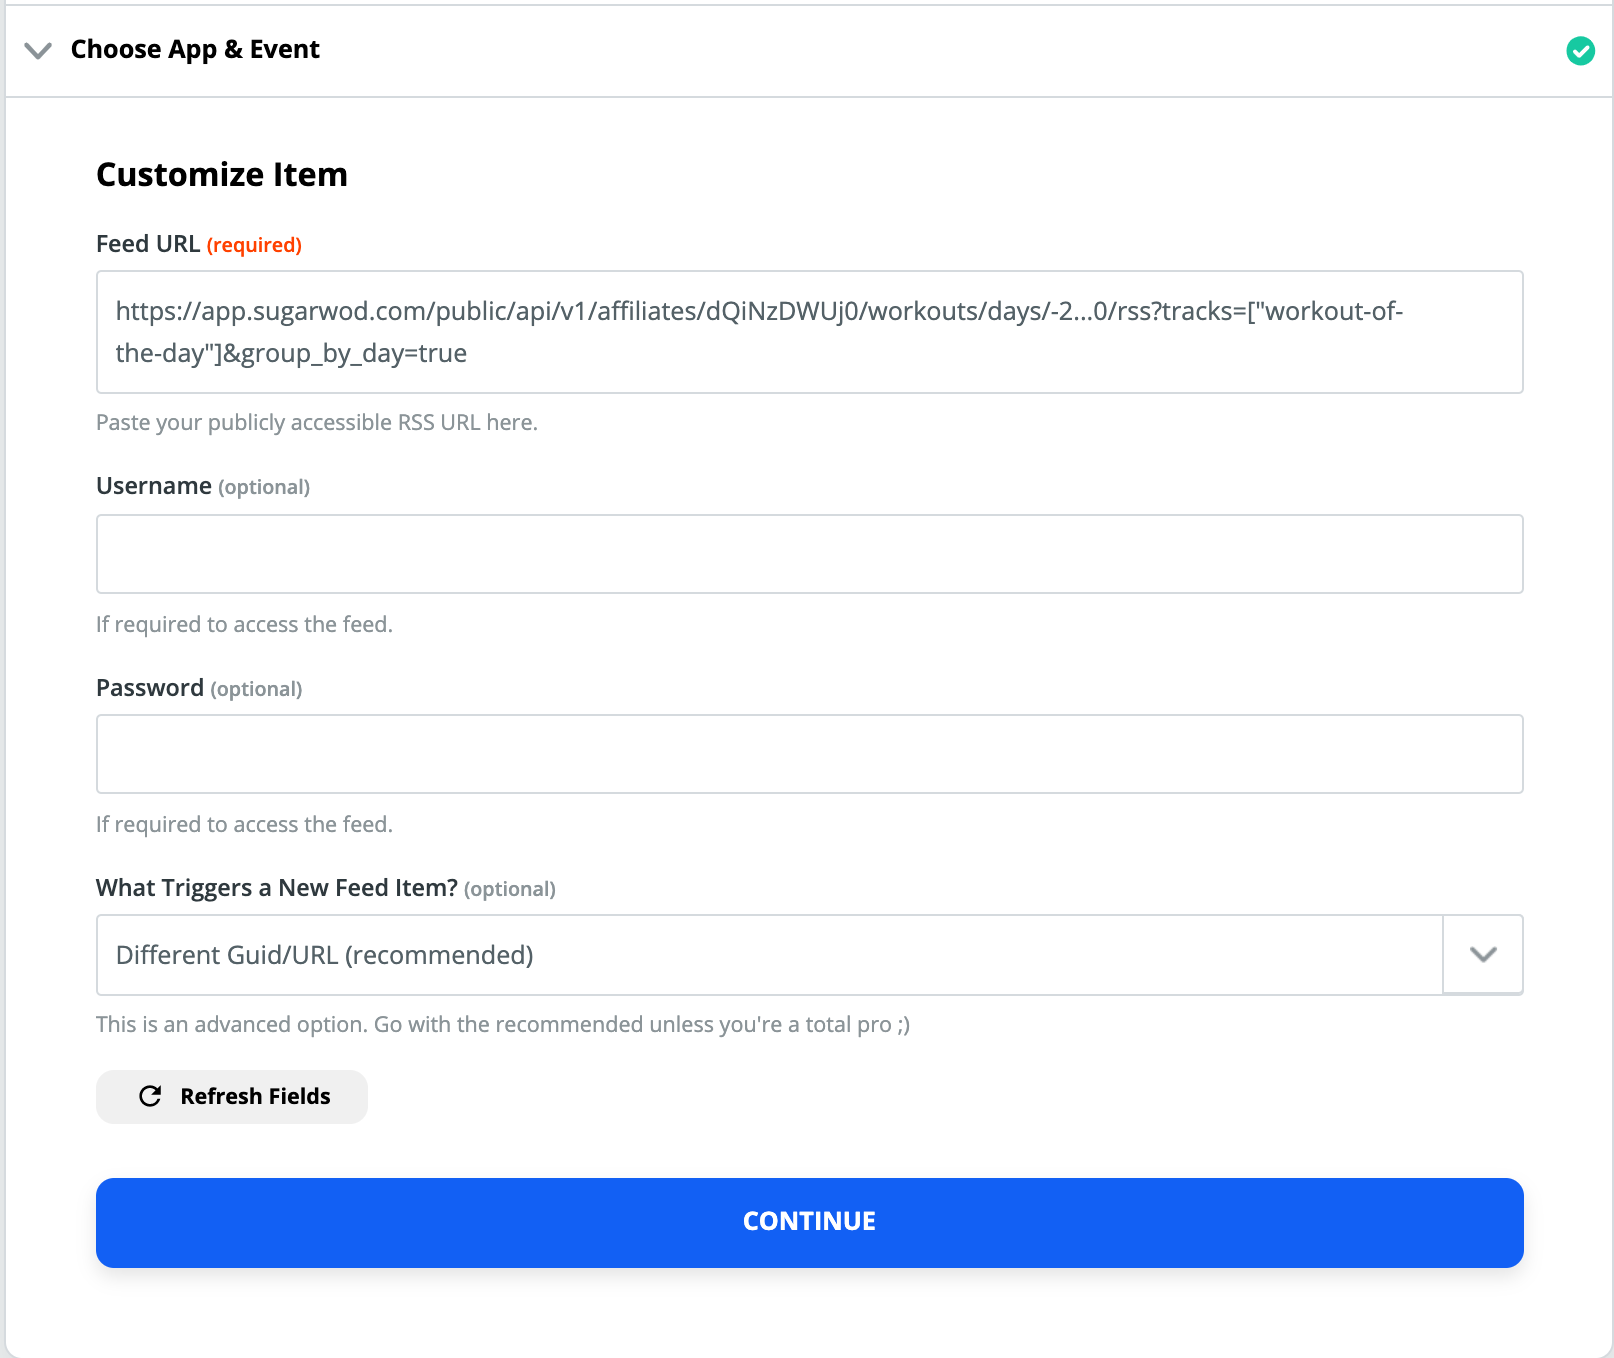
- Copy and paste your Feed URL from SugarWOD into the Feed URL field and select “Continue”. Note: You should not need to enter any information in the Username and password fields.
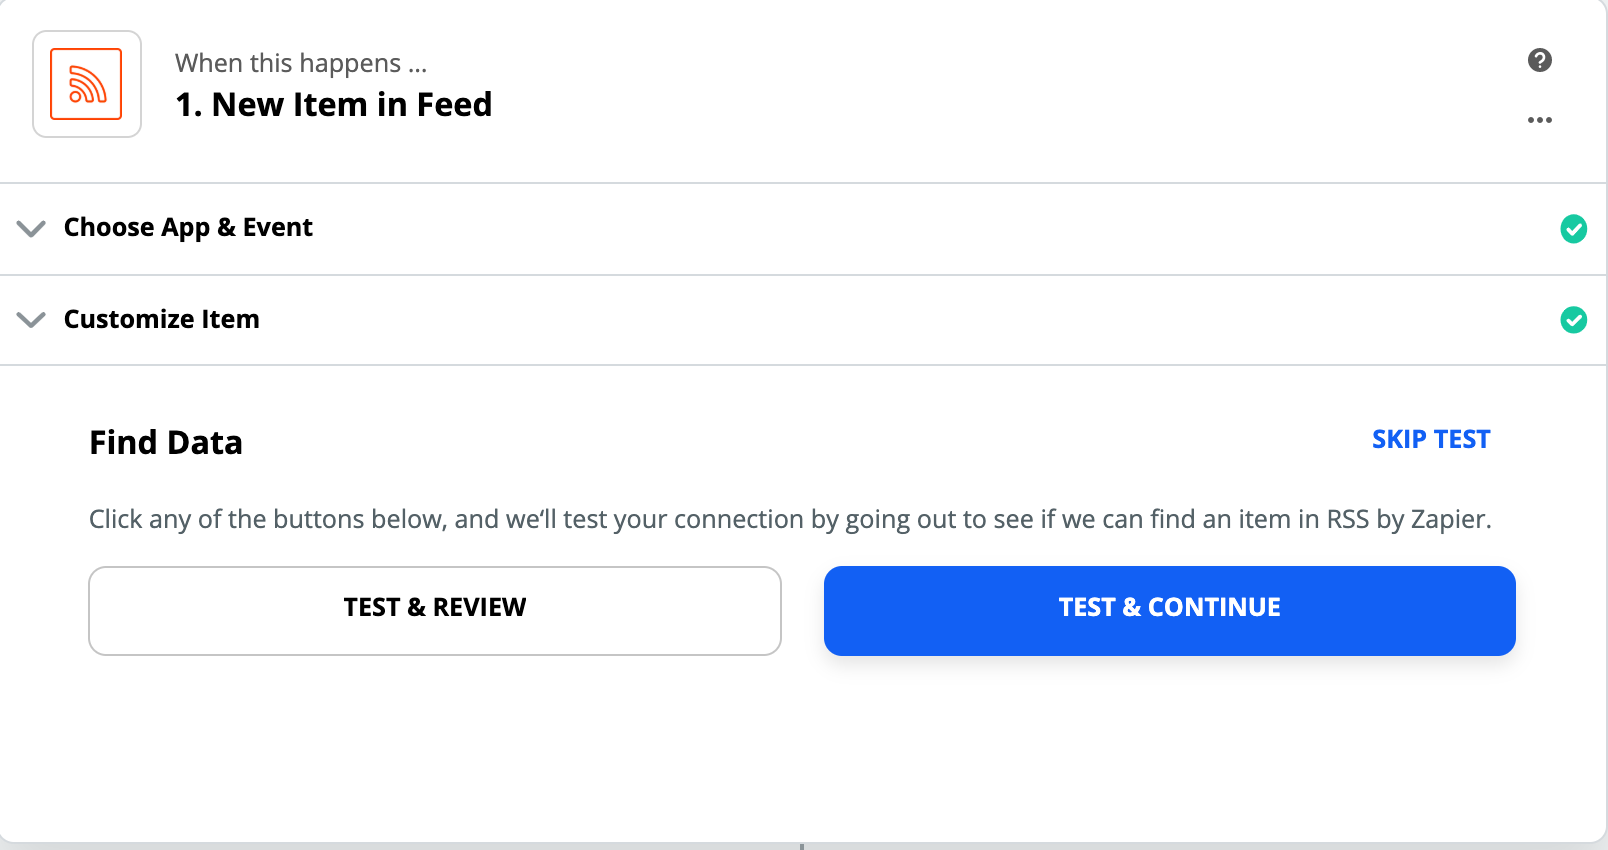
- Select the Test & Review button if you’d like to review the sample data Zapier finds from the RSS URL entered (this is your workout data). Or, select Test & Continue to move on to connecting to your Facebook. You can always go back to review the data before you publish your Zap if needed.
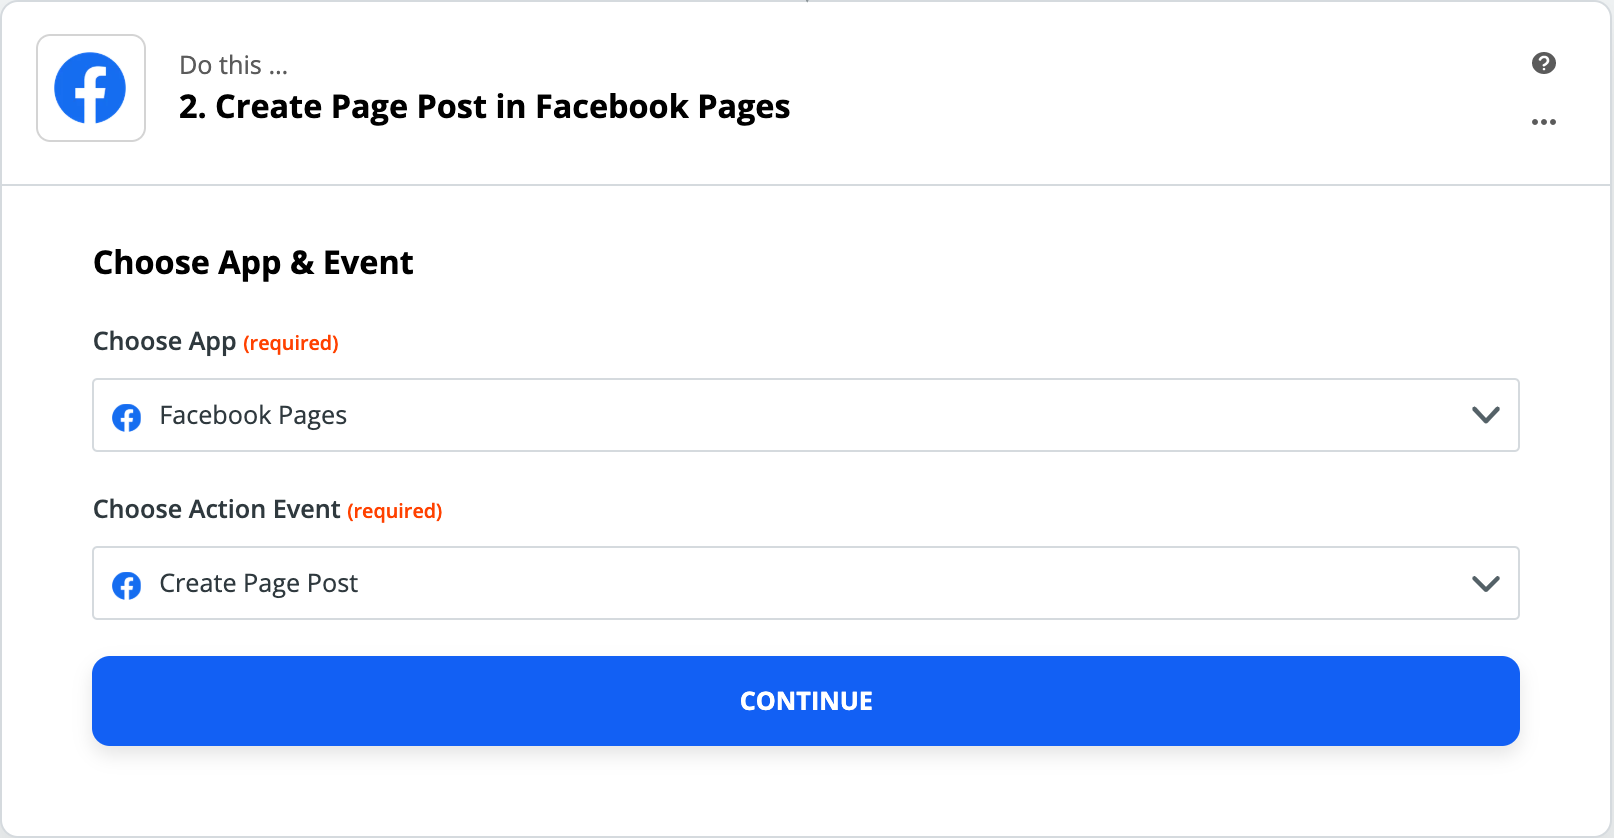
- Under “Choose App”, find the Facebook Pages app. Then, select Create a Page Post under “Choose Action Event”. Select “Continue”.
- Connect your Facebook account (Note: you will be connecting your personal account and then you will select which Page you want to post to later, so be sure that your personal account is an admin on the Page you want to post to.)
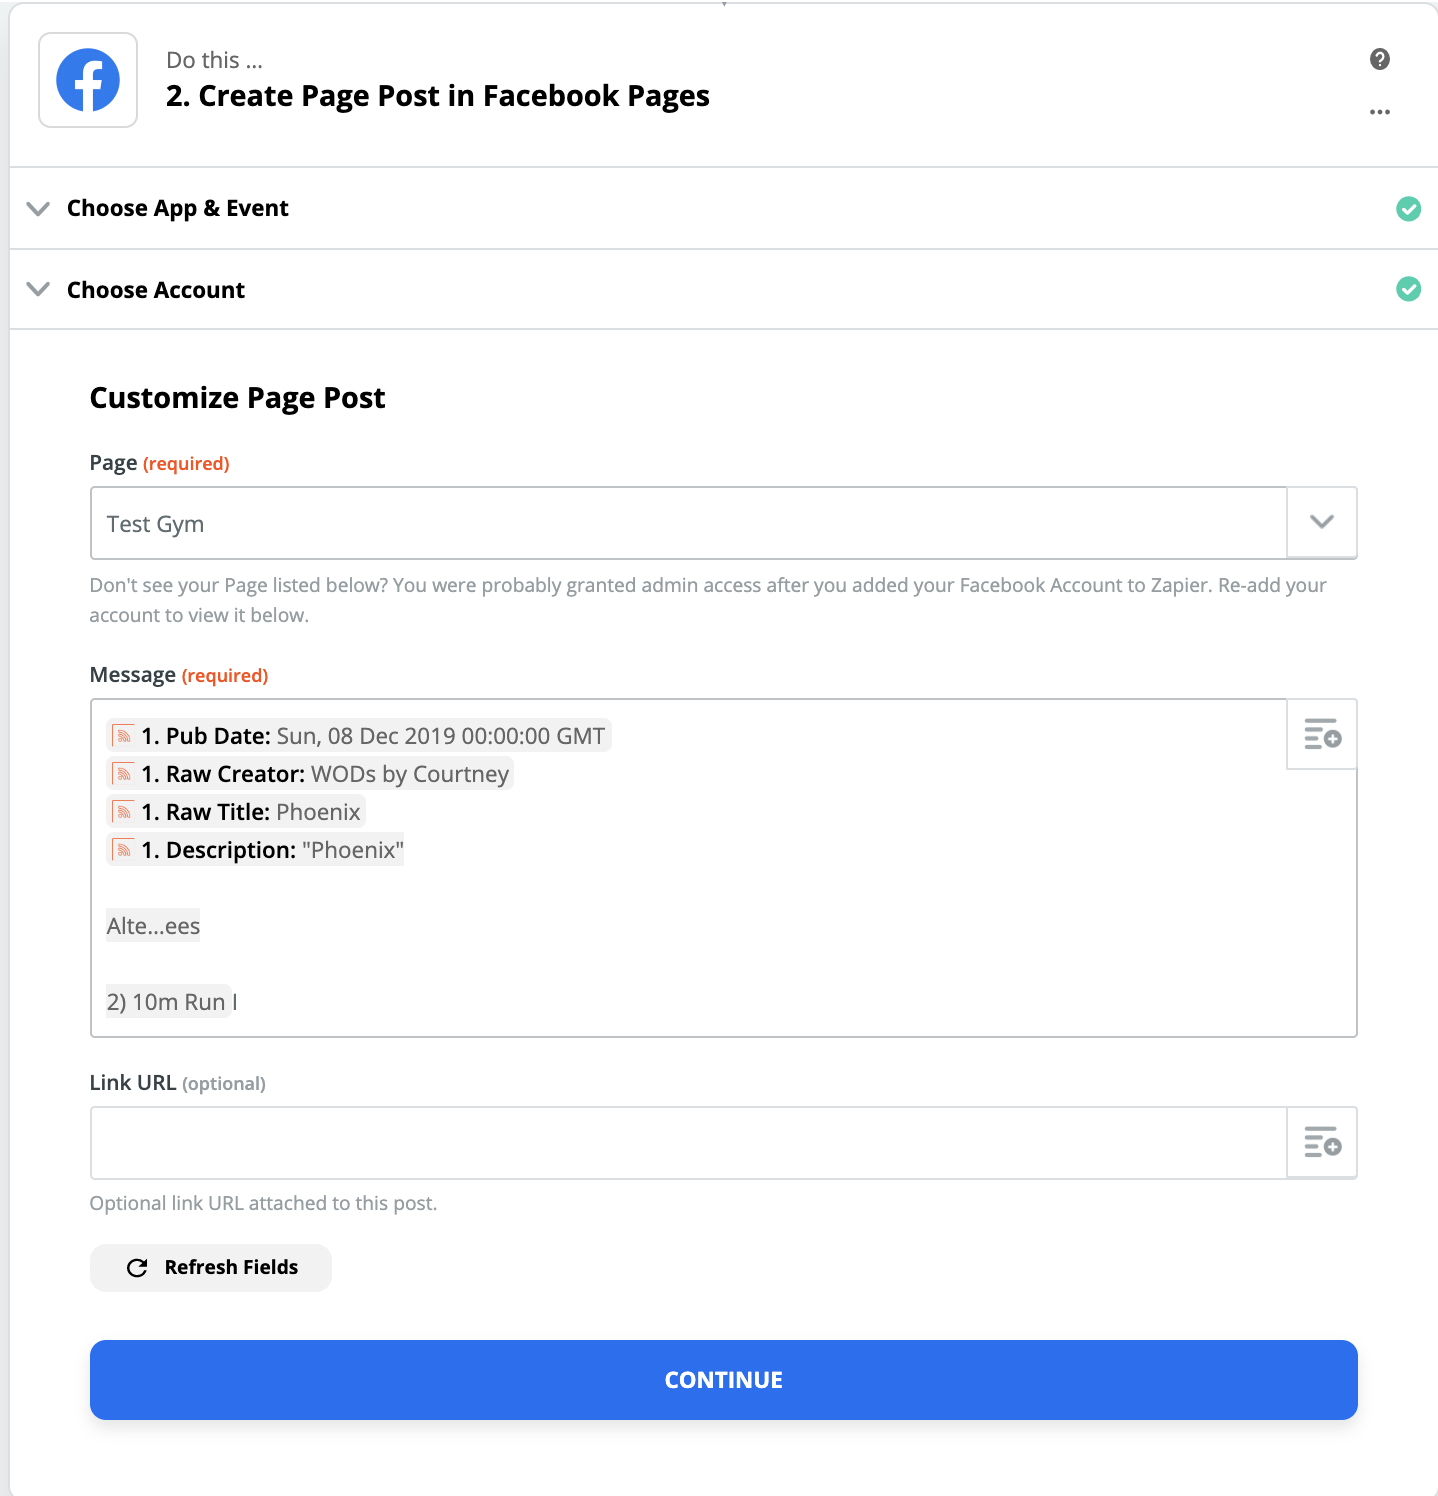
- Once your Facebook account has been connected, you can customize the page post. The Page drop-down should auto-populate your Gym’s Facebook page as an option. In the Message section, select the + in the top right corner to add the information your Page Post should include. For example, you can include the Title of the Workout, the publish date, the name of your gym in SugarWOD (Creator) and Description. You do not need to enter anything in the Link URL section. Select “Continue”.
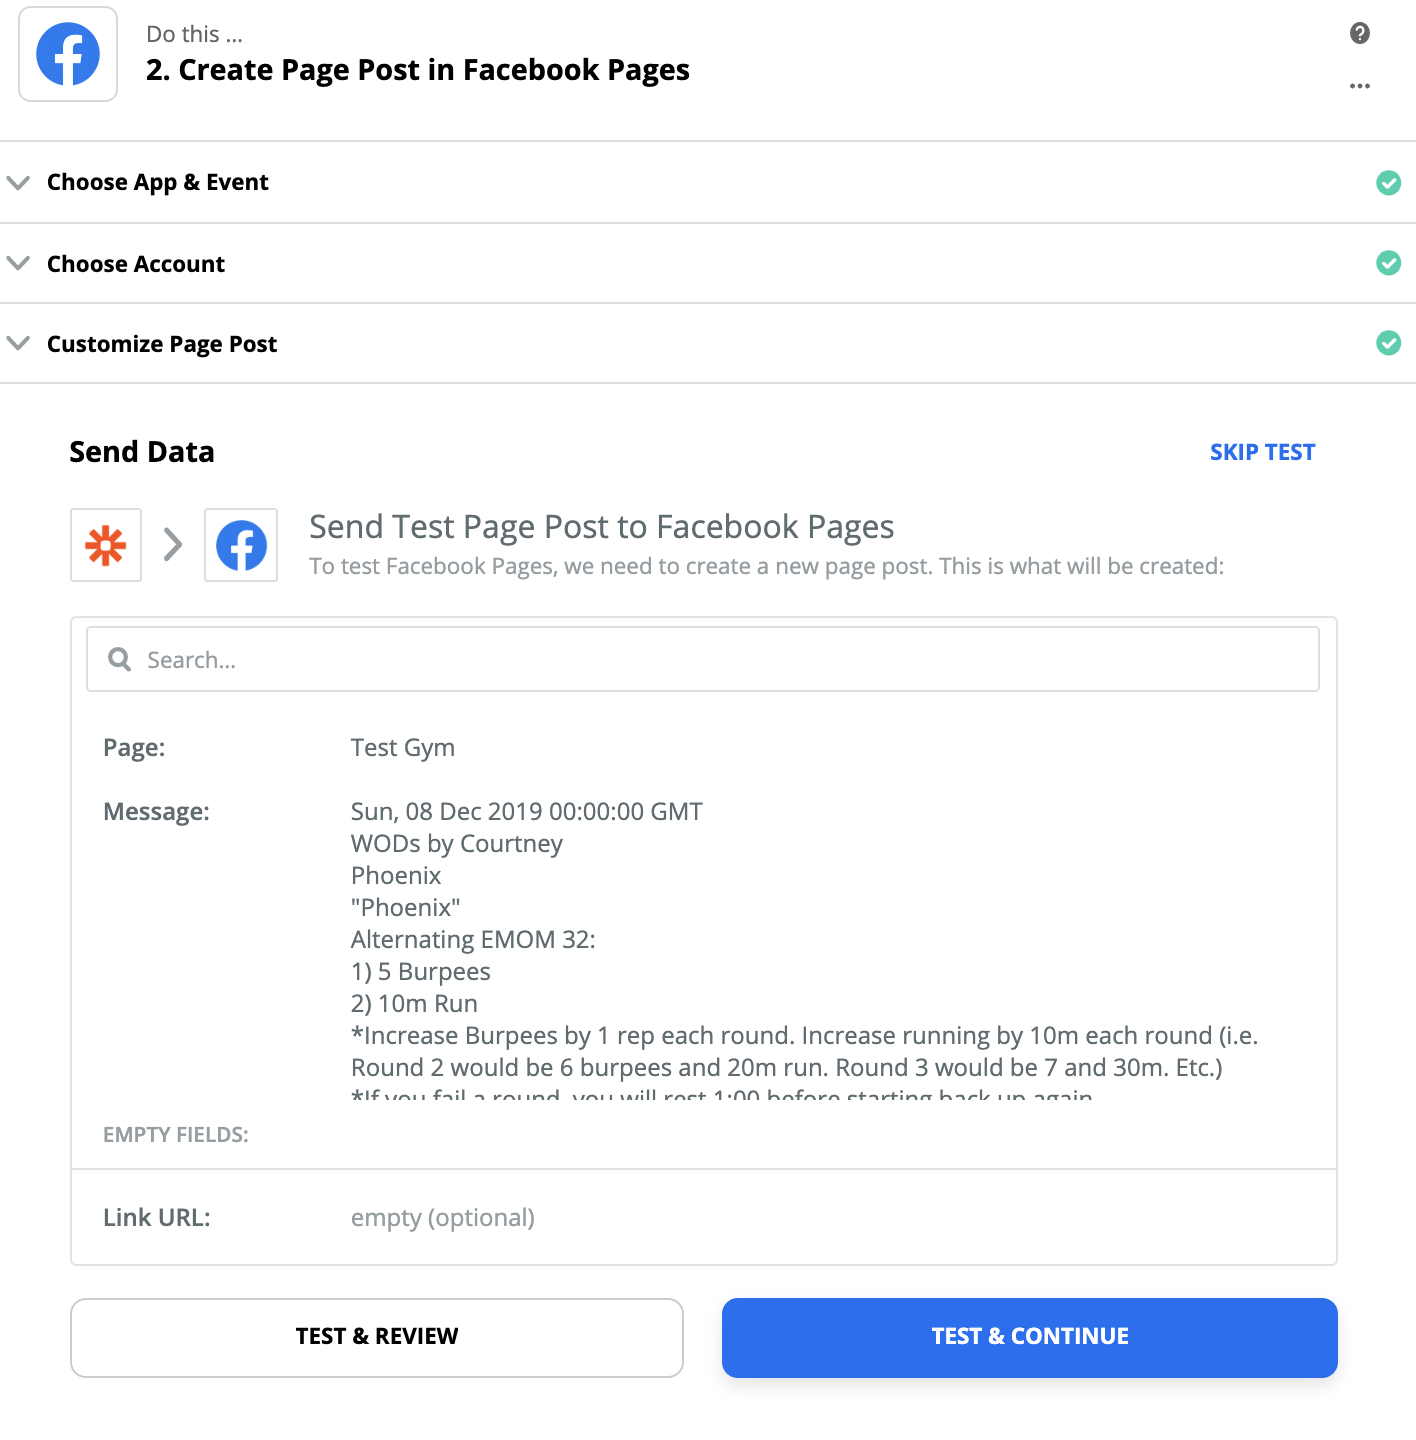
- Send a test to your Facebook Page. You can tweak your post until you get the display how you’d like.
 You should receive confirmation that says “Test was successful”.
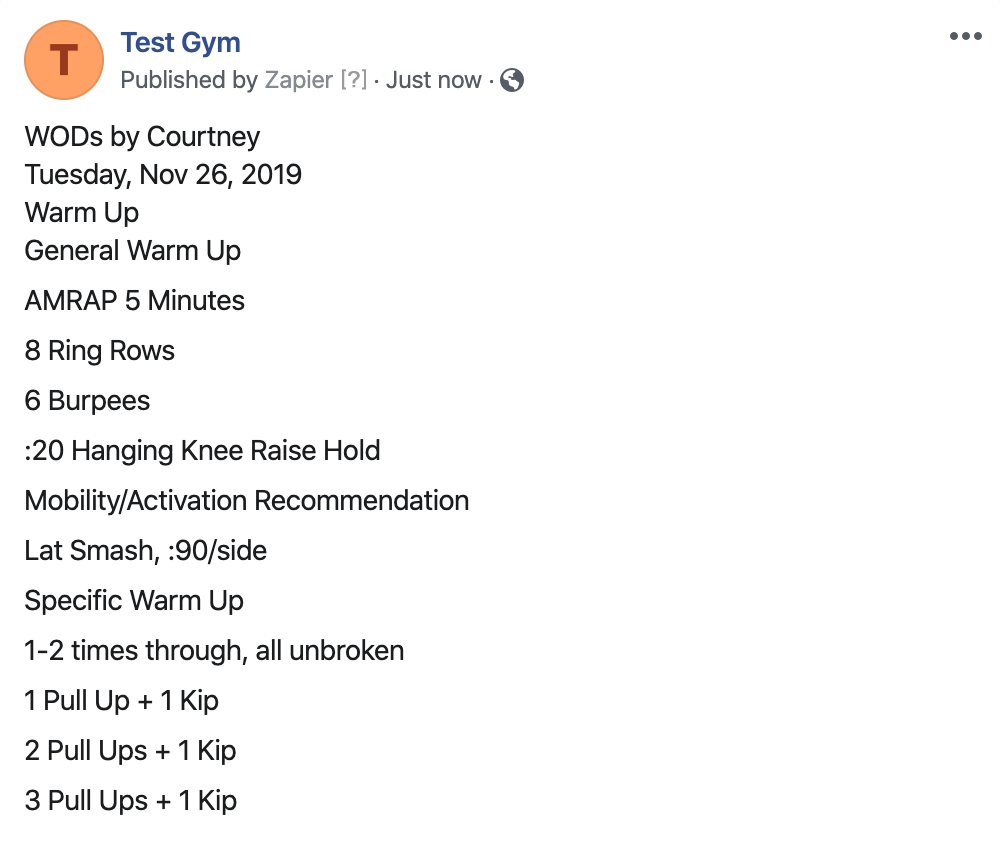
 - Select “Turn Zap On” and you should see a post like this on your Facebook page!
No more copying and pasting across a bunch of different places! Woot!
Editor’s note: This post was originally published on August 15, 2017 and has been updated for accuracy and comprehensiveness.